Removing a sink faucet may seem daunting, but it’s actually a fairly easy process. In this article, we’ll walk you through the steps to removing your old faucet and installing a new one, or putting the existing faucet back into place. We’ll also provide some tips on how to choose the right faucet for your needs. So if you’re thinking of giving your kitchen or bathroom a facelift, keep reading! And if you need any additional help, you can always call on the experts. At Miller & Sons Plumbing in Ocala, FL, no job is too big or too small for us to handle.
Turn Off the Water
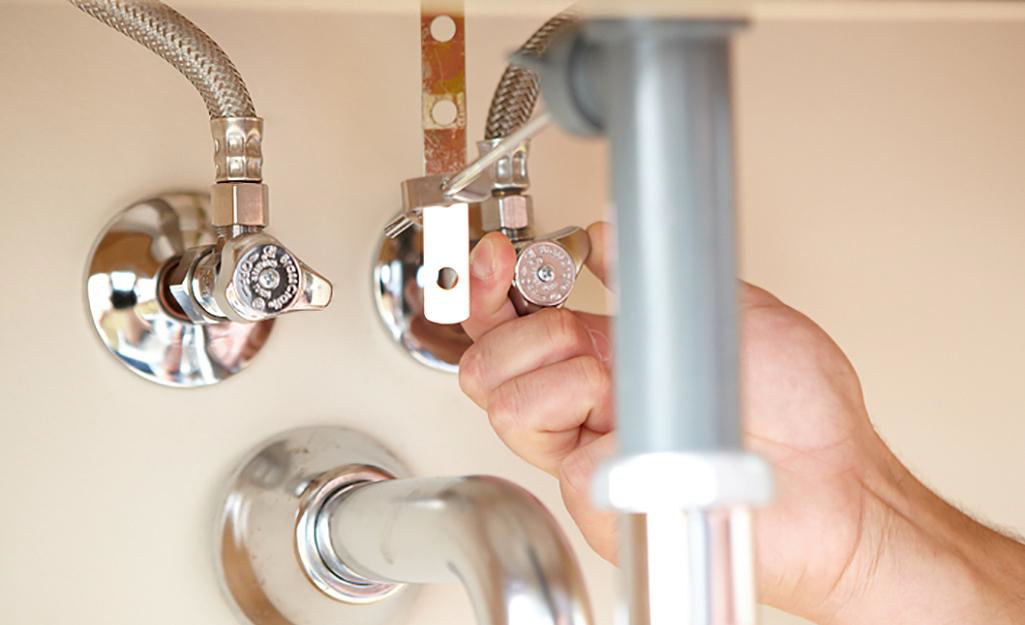
Before doing anything to your sink, be sure to turn off the water at the shut off valve. These are likely located under your sink, but the water can also be shut off via your home’s main water shut-off valve located in the garage, maintenance area or outside.
Removing Your Sink Faucet
Before doing anything to your sink, be sure to turn off the water at the shut off valve. These are likely located under your sink, but the water can also be shut off via your home’s main water shut-off valve located in the garage, maintenance area or outside.

- It bears repeating: Start by shutting off the water to your sink. You’ll find the shut-off valves under the sink. If you don’t see any valves, then your home’s main water shut-off valve is likely located in the garage or outside near the home. In some instances, there may only be a shut off at the well or the city water source. If there is a city water shut off only, we strongly encourage to contact the city as it is illegal to shut off the water source at any city tap.
- Once the water is turned off, open the sink faucet to release any residual water pressure.
- Use a pair of pliers to remove the aerator from the end of the faucet. The aerator is the small screen attached to the end of the faucet.
- Look for a retainer ring or cap underneath the sink. This piece is usually metal and it holds the faucet in place. Use a flathead screwdriver or an allen wrench to remove the retainer ring.
- Now you should be able to pull the faucet away from the sink. If it’s difficult to remove, try wiggling it back-and-forth until it comes loose. It may be sealed to the sink base with putty, so be conscious of this when removing the faucet.
- Once the faucet is removed, take a look at the sink to see how it’s mounted. You’ll either see exposed screws or a metal plate covering the screws. If you see screws, use a screwdriver to remove them. If you see a metal plate, use a putty knife to pry it off.
- Now you can remove the old sink faucet and dispose of it or set it aside for cleaning.
Please note the steps may change depending on the brand and style faucet you have currently installed.

Installing Your New (or Existing) Sink Faucet
Whether you’re installing a brand new sink faucet or replacing the existing one after a cleaning, follow the next steps to get it securely installed.
- Start by attaching the new faucet to the sink. If your sink is mounted with screws, use a screwdriver to secure the faucet in place. If your sink is mounted with a metal plate, use the screws that came with the faucet to attach it to the sink.
- Reattach the retainer ring or cap underneath the sink. This piece will hold the faucet in place.

- Now you can attach the aerator to the end of the faucet. The aerator is the small screen that’s attached to the end of the faucet.
- Turn the water to your sink back on via the shut-off valves under the sink (or your home’s main water shut-off valve).
- Once the water is turned on, open the sink faucet to check for leaks. If you see any leaks, tighten the connections until they stop. Shut off valves that have not been used frequently or recently can tend to leak. Make sure to check these by leaving a dry paper towel under them to watch for water spots.
Please note the steps may change depending on the brand and style faucet you have currently installed.
And that’s it! You’ve successfully removed your old sink faucet and installed a new one.